こんにちは!株式会社フォトラクションでプロダクトマネージャーをしています南風原(はえばる)です。
Photoruction Advent Calendar 2022の12日目の記事になります。
はじめに
ついに、待望のNuxt3が正式リリースされましたね👏
これからNuxt3を使ってみようと思っている初心者向けに、Nuxt3 × Vuetify × Instagram APIを用いた簡単な写真検索アプリをハンズオン形式で紹介していきたいと思います。
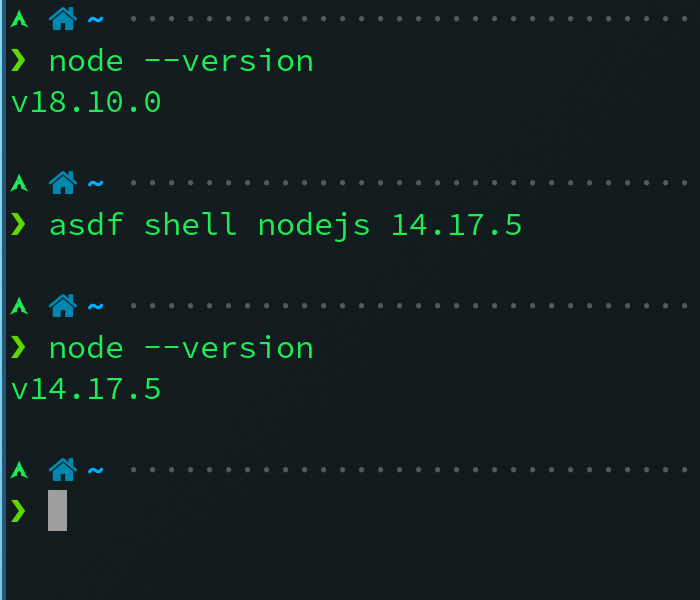
[前提]開発環境の各種バージョンは以下になります
os: macOS Monterey
node: v18.12.1
yarn: 1.22.11
Nuxt3をインストールしよう
npx nuxi init nuxt-instagram

cd nuxt-instagram

yarn install

yarn dev -o
Vuetify3をインストールしよう
yarn add vuetify@next mdi
yarn add -D sass
Nuxt3でVuetifyを利用できるようにしよう
// ./plugins/vueitfy.ts
import { createVuetify } from 'vuetify';
import * as components from 'vuetify/components';
import * as directives from 'vuetify/directives';

export default defineNuxtPlugin((nuxtApp) => {
  const vuetify = createVuetify({
    components,
    directives,
  });

  nuxtApp.vueApp.use(vuetify);
});
// ./nuxt.config.ts
export default defineNuxtConfig({
    css: ['vuetify/lib/styles/main.sass', 'mdi/css/materialdesignicons.min.css'],
    build: {
      transpile: ['vuetify'],
    },
})
- Instagramアカウントを作成する
- 設定から「プロアカウントに切り替える」をクリックしプロアカウントに切り替える
Facebookにログインし、任意のFacebookページを作成する
※ページ名に「Instagram」など固有サービス名を含めるとページがBANされてAPI利用できないので注意!
FacebookページとInstagramプロアカウントの紐づけをする
右上のアイコンクリック > 設定とプライバシー > 設定 > リンク済みのアカウント

「アカウントをリンク」よりFacebookページとInstagramアカウントを紐付けます

- Facebook for Developersにアクセスし「利用を開始」するよりFacebook for Developersアカウントを作成する
- 「アプリを作成」> 「ビジネス」> 基本情報を入力する
- FacebookアプリにInstagram APIを追加する
- 「InstagramグラフAPI」を追加する
- 左サイドメニュー「設定」の中の「ベーシック」をクリック
- アプリIDとApp Secretキーをメモし、「変更を保存」をクリック
アクセストークンを取得
1番目のアクセストークンを取得する
- ヘッダーの「ツール」から「InstagramグラフAPIエクスプローラー」をクリック
- 作成したアプリを選択し、「ページアクセストークンを取得」をクリックし、作成したFacebookページを選択し「完了」をクリック
↓1番目のアクセストークンをコピーする

2番目のアクセストークンを取得する
// ブラウザで下記URLにアクセスする
https://graph.facebook.com/v15.0/oauth/access_token?grant_type=fb_exchange_token&client_id=${アプリID}&client_secret=${app secret}&fb_exchange_token=${1番目のトークン}
{
    "access_token": "2番目のトークン",
    "token_type": "bearer",
    "expires_in": 5183464
}
- 3番目のアクセストークンを取得する
// ブラウザで下記URLにアクセスする
https://graph.facebook.com/v15.0/me?access_token=${2番目のトークン}
{
    "name": "山田 太郎",
    "id": "12345678"
}
上で取得したIDを使って、ブラウザで下記URLにアクセスします。
https://graph.facebook.com/v15.0/${id}/accounts?access_token=${2番目のトークン}
// 3番目のアクセストークンが発行される
{
    "data": [
        {
            "access_token": "3番目のトークン",
            "category": "xxxx",
            "category_list": [
                {
                    "id": "123456",
                    "name": "xxxx"
                }
            ],
            "name": "Facebookページ名",
            "id": "FacebookページID"
        }
    ],
    "paging": {
        "cursors": {
            "before": "xxxx",
            "after": "xxxx"
        }
    }
}
// 上で取得したIDを使って、ブラウザで下記URLにアクセスする
https://graph.facebook.com/v15.0/${FacebookページID}?fields=id,name,instagram_business_account&access_token=${3番目のトークン}
// InstagramビジネスアカウントID取得結果
{
    "id": "FacebookページID",
    "name": "Facebookページ名",
    "instagram_business_account": {
        "id": "InstagramビジネスアカウントID"
    }
}
「3番目のアクセストークン」と「InstagramビジネスアカウントID」の取得ができたので、晴れてInstagram GraphAPIの利用が可能となります!
.envに環境変数を追加しよう
.envに環境変数を登録後、nuxtから呼び出せるようにnuxt.config.tsにも定義します。
// ./nuxt.config.ts
export default defineNuxtConfig({
    runtimeConfig: {
      public: {
        instagramApiUrl: process.env.INSTAGRAM_API_URL,
        userId: process.env.USER_ID,
        accessToken: process.env.ACCESS_TOKEN,
      }
    }
})
検索フォームを作成してみよう
// ./app.vue
<template>
  <SearchInput />
</template>
// ./components/SearchInput.vue
<script setup lang="ts">
interface State {
    loaded: boolean
    loading: boolean
    value: string
}

const state = reactive<State>({
    loaded: false,
    loading: false,
    value: ''
})

interface Emits {
  (e: 'search', value: string): void
}
const emit = defineEmits<Emits>()

const handleSearch = () => {
    state.loading = true
    setTimeout(() => {
        state.loading = false
        state.loaded = true
    }, 2000)
    emit('search', state.value)
}
</script>
<template>
    <v-text-field
        v-model="state.value"
        :loading="state.loading"
        density="compact"
        variant="solo"
        label="検索"
        append-inner-icon="mdi-magnify"
        single-line
        hide-details
        @click:append-inner="handleSearch"
     />
</template>
↓こういう感じで、表示されればOK👌

APIエンドポイントを定義
外部APIを直接呼び出そうとするとCORSエラーになってしまうので、server/api にAPIエンドポイントを定義して呼び出すようにします。
// server/api/hashtagId.ts
export default defineEventHandler ( async (event) => {
    const config = useRuntimeConfig()
    const query = getQuery(event)
    const result = await $fetch(`${config.public.instagramApiUrl}/ig_hashtag_search`, {
        params: query
    })
    return result
})
// server/api/recentMedia/[hashtagId].ts
export default defineEventHandler ( async (event) => {
    const config = useRuntimeConfig()
    const query = getQuery(event)
    const result = await $fetch(`${config.public.instagramApiUrl}/${event.context.params.hashtagId}/recent_media`, {
        params: query
    })
    return result
})
データ取得に関するロジックを書く
composablesディレクトリにデータ取得などのロジックを書くことで、Vue側で自動インポートされて利用できるようになります。
// ./composables/useInstagram.ts
import { Media } from '@/@types/instagram'

export const useInstagram = () => {
    const config = useRuntimeConfig()
    const medias = ref<Media[]>([]);

    const getHashtagId = async (hashtag: string) => {
        const response = await $fetch('/api/hashtagId', {
            params: {
                user_id: config.public.userId,
                access_token: config.public.accessToken,
                q: hashtag
            }
        })
        return response.data[0].id
    }

    const getRecentMedia = async (hashtag: string) => {
        const hashtagId = await getHashtagId(hashtag)
        const response = await $fetch(`/api/recentMedia/${hashtagId}`, {
            params: {
                user_id: config.public.userId,
                access_token: config.public.accessToken,
                fields: 'id,media_url,permalink,media_type,timestamp'
            }
        })
        medias.value = response.data.filter(i => {
            if(i.media_url && i.media_type === 'IMAGE') {
                return true
            }
            return false
        })

        return medias.value
    }

    return {
        getHashtagId,
        getRecentMedia,
        medias
    }
}
Vue側でComposablesな関数を呼び出してみよう
<script setup lang="ts">
import { useInstagram } from '@/composables/useInstagram'
const { getRecentMedia, medias } = useInstagram()

const handleSearch = async (keyword: string) => {
  await getRecentMedia(keyword)
}
</script>

<template>
  <div class="wrapper">
    <SearchInput class="mt-8" @search="handleSearch" />
    <v-row class="my-8">
        <v-col
          v-for="media in medias"
          :key="media.id"
          class="d-flex child-flex p-2"
          cols="4"
        >
        <v-card min-width="100%">
          <v-img
            :src="media.media_url"
            aspect-ratio="1"
            cover
            class="align-end"
          >
            <template v-slot:placeholder>
              <v-row
                class="fill-height ma-0"
                align="center"
                justify="center"
              >
                <v-progress-circular
                  indeterminate
                  color="grey-lighten-5"
                ></v-progress-circular>
              </v-row>
            </template>
          </v-img>
        </v-card>
        </v-col>
    </v-row>
  </div>
</template>

<stype lang="scss" scoped>
  .wrapper {
    width: 65%;
    margin: 0 auto;
  }
</stype>
完成形

まとめ
実際作ってみて、Nuxt3を使う以前にInstagram Graph APIの事前準備のところで手こずってしまい意外と時間かかってしまいました。
久々に個人開発をして楽しかったので良しとします笑
Nuxt3になってからTypeScriptのサポートが強化されたのはもちろんのこと、ビルドのスピードがより速くなったり、各ディレクトリのルールに沿ってファイルを作成することで自動インポートをしてくれたり、書き方がシンプルになったり、などなどNuxt2よりも爆速で開発ができるようになった印象です。
まだまだ、情報が少ない部分もありますがぜひNuxt3を使っていきましょう〜♪
最後に、今回作成したものはGitHubにあげています。
少しでも参考になれば幸いです。
株式会社フォトラクションでは一緒に働く仲間を募集しています